How to Open Chrysler 300 Trunk With Dead Battery
Chrysler 300 12V Automotive Battery Replacement Guide
How to change a dead 12 volt car battery in the trunk of a 2nd generation 2011 to 2017 Chrysler 300 with part numbers.
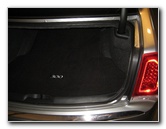
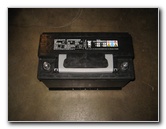
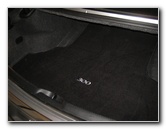
2016 Chrysler 300 Trunk

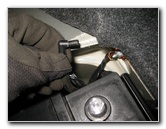
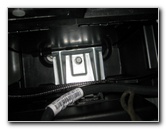
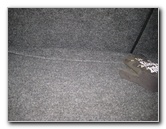
Velcro Flaps - Back of Trunk

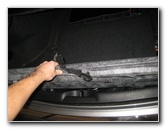
Pull Off Velcro Fasteners This automotive maintenance tutorial was specifically written to assist owners of the second generation (2011, 2012, 2013, 2014, 2015, 2016 & 2017) Chrysler 300, 300C or 300S sedan in changing a dead 12V automotive battery in the trunk.
Owners of other Chrysler, Dodge, Jeep and RAM vehicles such as the Town & Country, 200, Pacifica, Avenger, Charger, Journey, Challenger, Dart, Durango, Magnum, Grand Caravan, Grand Cherokee, Renegade, Wrangler, Compass, Liberty, Patriot, ProMaster, 1500 and C/V Tradesman minivan may also find these DIY instructions to be helpful.
A few compatible replacement "Group Size" 94R or H7 batteries with their part numbers include the following: ACDelco 94RAGM, Exide Edge FP-AGML4/94R, EverStart MAXX-H7, AutoCraft Platinum H7-AGM, Odyssey 34-PC1500T, Bosch S6587B S6 and Mopar BB0H7730AA.
The tools needed to complete this procedure include a 10mm socket, an extension bar and a 3/8" drive ratcheting wrench.

Peeling Off Velcro Cover
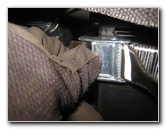
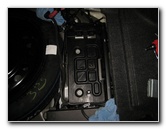
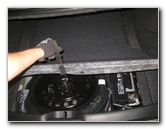
Lift Out Floor Board

Floor Board & Mat Removed The first step is to open the trunk lid.
Then peel off the Velcro flaps at the back of the trunk (near the rear passenger seats) from the top of the floor mat.
Lift the carpeted floor mat and the rigid floor board out of the trunk. Set them aside in a safe place.
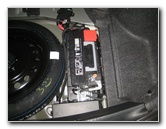
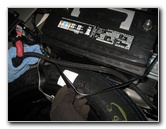
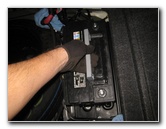
Battery Next To Spare Tire
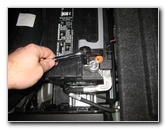
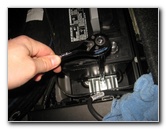
Loosen Negative Terminal
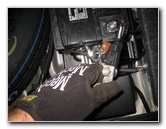
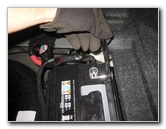
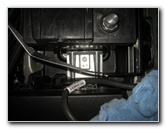
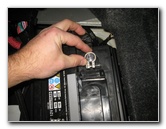
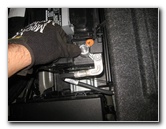
Pull Off "-" Terminal The OEM 12V battery is on the right (passenger) side of the trunk next to the spare tire and in front of the small electrical fuse box.
First loosen the negative "-" terminal by turning the nut counterclockwise with a 10mm socket and a ratcheting wrench.
Pull the negative terminal off the battery post.
Cover & Tuck Away
Pull Off Red Plastic Cover
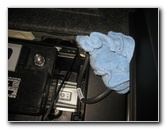
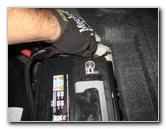
Positive Terminal Cover Cover the negative terminal with a small towel and tuck it away on the side of the battery to help prevent accidental contact.
Pull the red plastic cover off the positive terminal and set it aside in a safe place.
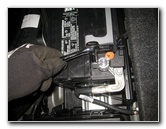
Loosen Positive Terminal
Pull Off "+" Terminal
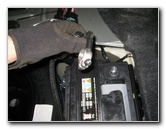
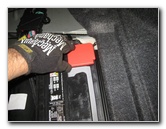
Positive Terminal Removed Loosen the 10mm nut on the positive "+" terminal by turning it counterclockwise.
Pull the positive terminal off the "+" battery post and tuck it away on the side of the battery.
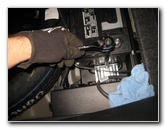
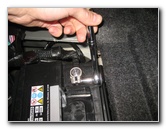
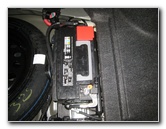
Battery Exhaust Vent Tube
Pull Out Vent Hose

Vinyl Strap - Metal Buckle Gently pull the plastic plastic exhaust vent tube fitting out of the hole in the side of the old battery.
Locate the black vinyl strap on the side of the battery.
Press In Tab - Release Strap
Release Battery Strap
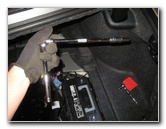
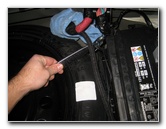
10mm Socket & Extension Press in the silver metal tab to release the buckle and loosen the strap away from the old battery.
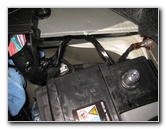
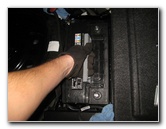
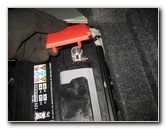
The old battery is still held in place by a silver metal hold down bar or "clamp" at the front edge (rear of the vehicle).
Attach the 10mm socket to a long extension bar and the 3/8" drive ratcheting wrench.
Hold Down Bar - Rear
Loosen Counterclockwise

10mm Bolt Removed Loosen the single 10mm bolt that secures the silver metal battery hold down clamp in place by turning it counterclockwise.
Set the 10mm bolt aside in a safe place.
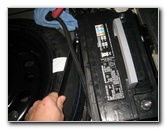
Remove Battery Clamp
Handle - Lift Out Old Battery
Old Battery Removed Lift out the metal battery hold down bar and set it aside in safe place.
Raise the grey plastic handle on the old OEM battery and lift it out of the trunk.
Carefully set the old battery on the ground. Try to avoid tipping over or dropping the old battery to prevent from having acid leak out.
Be sure to bring the old battery with you to Walmart or the auto parts store to prevent from having to pay a "core" fee or a "recycling" charge. The retailer will also have the old battery properly recycled.
Clean Off Battery Tray
Lower In New Battery
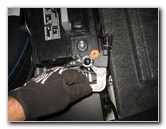
Replace Metal Clamp Clean off any debris from the plastic battery tray so that the new battery will rest evenly on it.
Carefully lower in the new "Group Size" 94R of H7 battery in to the trunk.
The "-" negative battery post should be at the rear of the vehicle and the "+" positive battery post should be closer to the front of the car.
Lower the metal hold down bar back down in to place in between the battery and the trunk electrical fuse box.
Spin In 10mm Bolt
Tighten Clockwise

Tighten the battery hold down clamp bolt in the clockwise direction with the 10mm socket, extension bar and 3/8" drive ratcheting wrench.
Push the battery exhaust vent tube in to the hole on new battery.
Pull Vinyl Strap
Tighten Battery Strap
Push On Positive Terminal Firmly pull the end of the vinyl strap to secure the new battery in place.
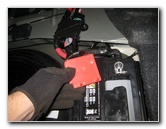
Push the positive terminal on to the "+" post on the new 12V battery.
Tighten 10mm Clockwise
Push On Red Plastic Cover
Negative Battery Terminal Tighten the positive terminal nut in the clockwise direction with the 10mm socket and a ratcheting wrench.
Push the red plastic cover over the positive battery terminal.
Remove the towel from the negative terminal.
Push On "-" Terminal
Tighten 10mm Nut
New Battery Installed Push the negative terminal over the "-" battery post.
Tighten the 10mm terminal nut in the clockwise direction until it is snug.
Try to avoid over tightening the terminal nut to prevent from cracking or damaging the battery post which may lead to an acid leak.
Double check that the new 12V battery is securely in place.
If the new battery can be rocked, slid or moved around on the battery tray, tighten the hold down bolt another turn or two and pull hard on the vinyl strap.
Replace Trunk Floor Board
Secure Velcro Flaps
12V Battery Replaced Re-insert the floor board and replace the carpeted floor mat in to the trunk.
Secure the Velcro flaps to hold the trunk mat in place.
Test the new 12 volt car battery by starting the engine and flashing the high beams.
Please be sure to adjust the time on the clock and program your favorite radio station presets before driving.
For more, check out all of my 2011-2017 Chrysler 300 DIY Repair & Maintenance Guides.
How to Open Chrysler 300 Trunk With Dead Battery
Source: https://www.paulstravelpictures.com/Chrysler-300-12V-Automotive-Battery-Replacement-Guide/

0 Response to "How to Open Chrysler 300 Trunk With Dead Battery"
Post a Comment